Quick UX Prototyping With Adobe XD Shortcuts (PDF Cheat Sheet)

Email Newsletter
Weekly tips on front-end & UX.
Trusted by 200,000+ folks.
(This is a sponsored article.) Every designer has their favorite prototyping tools. However, when it comes to UX wireframing and prototyping, there is often more than one tool involved. Sooner or later, you find yourself switching from one tool to another to cherry-pick the best ones among them.
Adobe announced Project Comet in October last year to provide a fast and efficient all-in-one solution. A few months ago, the secret behind the codename was revealed and pushed to the public in a preview version: Adobe Experience Design CC (Adobe XD). Made for fast and fluid UX design, XD gives you everything in one neat bundle: it lets you sketch out ideas, create interactive prototypes, test and share them.
To give you a head start when working with XD, we have compiled 15 pro tips, including features that might not be obvious at first glance but that will make your prototyping workflow a lot smoother.
Adobe XD is currently still in public beta and free to download, even if you’re not a subscriber of Creative Cloud. Also, new features are added on a regular basis. Please note that a Windows version is in the works and due later in 2016, but for now Adobe XD is available for Mac OS X only.
Repeat Grid
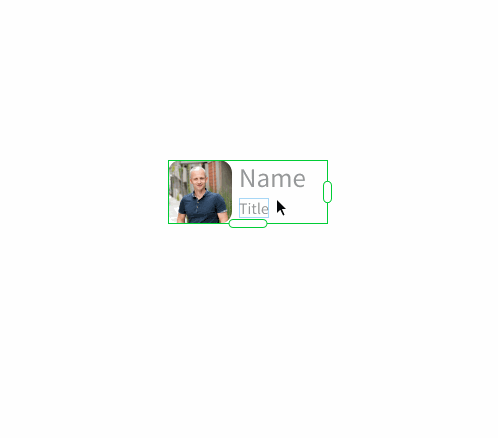
Grow A Repeat Grid
To spare you the process of manually copying and pasting objects, XD offers a feature called Exploring Repeat Grid. Select the item you want to repeat and click on the repeat grid button in the property inspector on the right (or use the shortcut Cmd + R). Now you can drag the green handles to repeat your items. To drag out or grow a repeat grid from the center, hold down the Option key while dragging. This might come in especially handy when you want to keep a group of objects centered on your artboard.
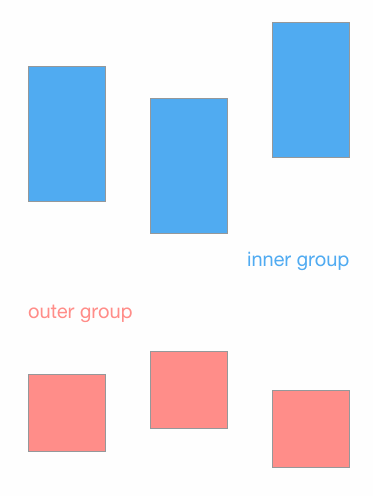
Enter And Exit The Edit Context
A repeat grid is treated as a group. If you want to add something to all items in your repeat grid, double-click to enter the edit context of your grid, and draw, paste or add elements. This prevents you from having to un-group and re-group all the time. To pop up a level in your group or repeat grid, press the Escape key.

Adjust Padding
Need to adjust the padding in your grid? Select the repeat grid, hover over the space between your items, and drag until the padding is as you’d like it to be. XD even provides numbers, so you get a better feeling for how far apart the cells are.
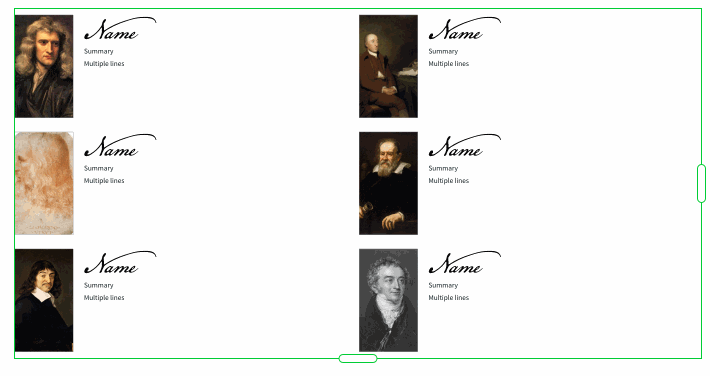
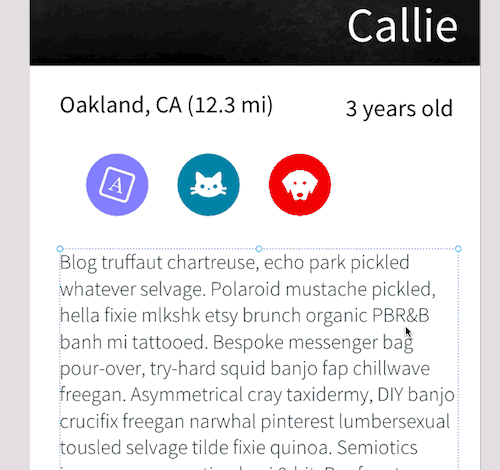
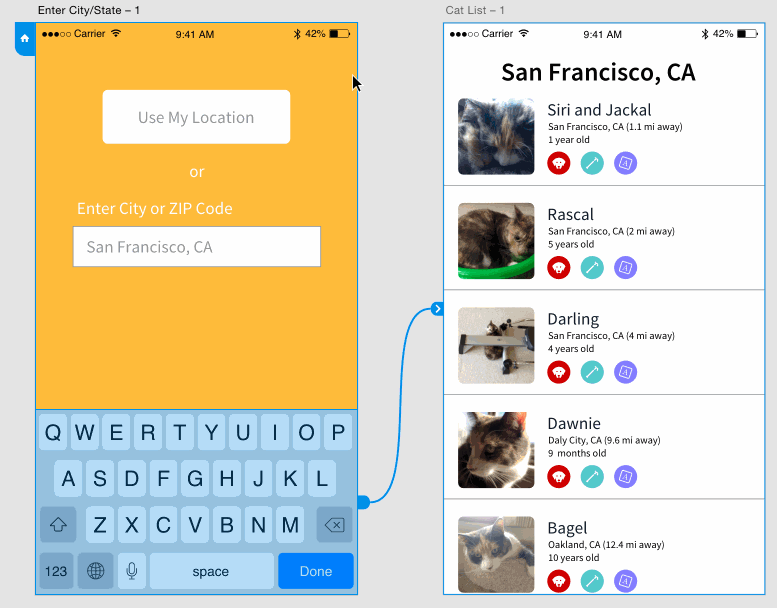
Insert Data
Designing with real data is another nifty feature of XD. Instead of using the same placeholder text for every object, you can drag any Return-separated TXT file from your Finder onto any text object to fill the grid with unique content.
Drawing
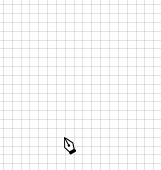
Artboard Grids
Artboard grids provide more orientation when drawing with the Pen tool. They let you drag objects to snap to the grid, and you can also snap your anchor points to them as you draw. To enable the grid, click the Artboard icon in the toolbar and set the tick to Grid in the properties bar on the right. There you can also adjust the size and color of the grid to your liking.
Draw And Resize From The Center
Want to draw or resize from the center? Hold down the Option key.

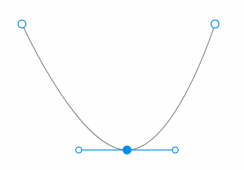
Bézier Curves
Bézier curves in XD are a breeze to create. Any anchor point you draw with the Pen tool can convert to a curve just by double-clicking it. To switch the curve back to a point, repeat.
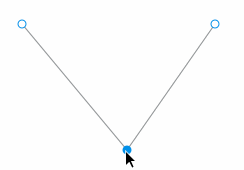
To create an asymmetrical curve, do the same as described above, hold down the Option key and drag and rotate the control points to adjust the curve.
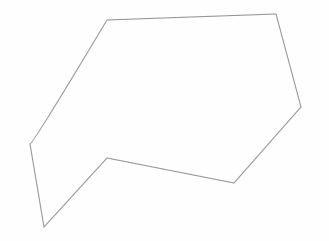
Open A Path
If you have a closed path, the beginning and end point is highlighted when you first select the Pen tool. Click the point to open the path so you can continue to draw and change the shape as required.
Turn Off Smart Guides
Smart Guides allow you to snap to anything on your artboard: the distance between nearby objects, the edges and center of the artboard and other objects, for example. If these aids get too distracting or if your artboard looks too complex, you can turn them off by holding down the Cmd key while dragging.
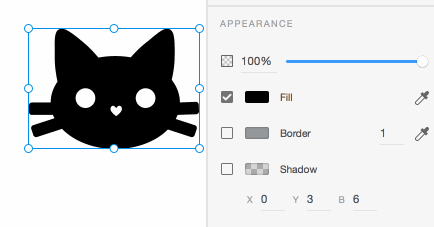
Change Opacity
To quickly change the opacity of an object, select the object and start typing numbers. 9 = 90%, 8 = 80%, etc.; and 0 gets you back to 100%.
Images
Image Mask
If you want to mask an image, drag it into a rectangle to auto-clip or mask it with an object. Masking gives you more control as it allows you to reposition and even makes complex objects using the Boolean groups to create a mask. By double-clicking inside, you can adjust both the mask and the image being masked. Masks won’t destroy the image, so if you aren’t satisfied with the result, just un-group and re-mask.
Prototyping
Unwire An Object
In prototyping mode, you wire items to artboards to create transitions between them and get a feeling for how users will experience your design. If you want to unwire something, just drag either side of the wire to remove the connection.
Sharing Prototypes
You can share prototypes over the web, and you can send a scripted walkthrough of your prototype to team members, stakeholders or clients. To record a scripted walkthrough, click the play button in the upper-right corner of your prototype screen. Click on the record button at the top-right of the Preview window and start interacting with your prototype. As soon as you’re done, click the record button again, and save the recording as a MOV file. Now you can share it.
Miscellaneous
Reuse Text Styles
If you want to reuse a text style that you’ve already set on another text object, you can select the text object first, switch to the Text tool (T), then click and begin typing. XD will automatically pick up the text styles from the previously selected object. Convenient.
Edit A Group
Nesting groups are a powerful concept in XD. To enter edit context, double-click on a group. If you have a group within a group, you can double-click on the inner group as well. You can draw, add text, and even paste in edit context. To pop up a level in your edit context, press the Escape key.
Other Resources
- A list of all keyboard shortcuts that you can use in Adobe Experience Design,
- Adobe’s XD pro tips videos provide instructions and workflows on using XD’s features. A sample file lets you try them out yourself,
- Adobe help site with common questions, tips and tricks and short tutorials,
- Articles on UX and UI Design best practices at the Adobe XD blog,
- Inspiring projects created with Adobe XD on Behance,
- New features are added to XD on a regular basis. So keep an eye on the new features announcements to not miss anything,
- The Adobe XD team is looking forward to hearing your feedback on Adobe XD UserVoice
Thanks to Elaine Chao (@elainecchao) for the help with this article.
Further Reading
- How To Design Error States For Mobile Apps
- How To Create Icons With Adobe XD
- Animated Microinteractions In Mobile Apps
- Exploring Repeat Grid in Adobe XD [](https://www.smashingmagazine.com/2016/11/exploring-repeat-grid-in-adobe-xd/)